
How to install
Follow these steps:
-
Install Witchcraft Chrome extension: get it here
-
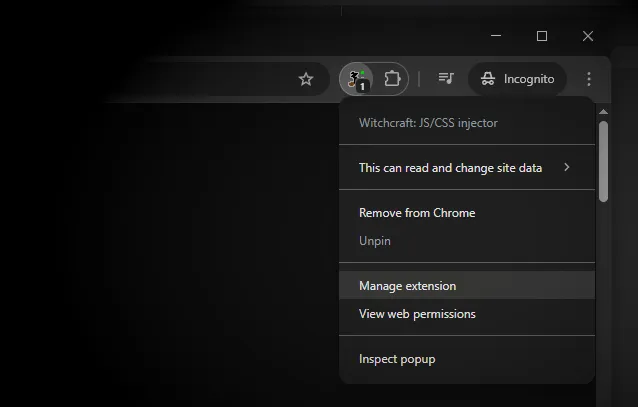
Right-click on the extension icon in the Chrome toolbar and choose “Manage extension”
-
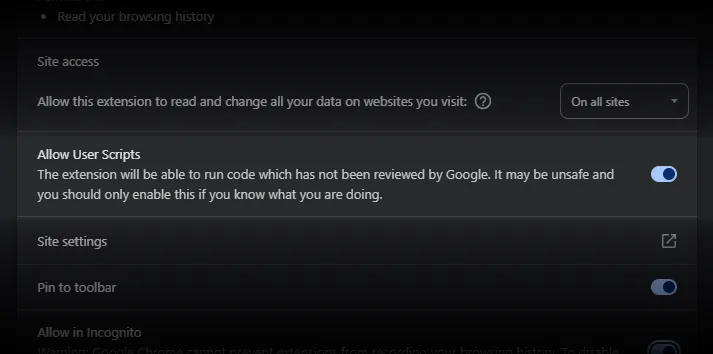
Enable the “Allow user scripts” option
-
Choose a local folder where your scripts will be stored. For instance,
~/witchcraft-scripts(create it now if it doesn’t exist yet) -
Start a local web server to serve that folder. You can use any web server you like, but here are some simple options:
Terminal window python3 -m http.server 5743Terminal window npx http-server . -p 5743A WSL2 bash script + Windows Task Scheduler to auto-start it. See details here.
docker-compose.yml version: "3.9"services:web:image: nginx:alpinecontainer_name: simple-webports:- "5743:80"volumes:- ./witchcraft-scripts:/usr/share/nginx/html:roJust make sure to change
./witchcraft-scriptsto the correct path of your scripts folder.Homelab alternative
A wild idea is to run a Docker container in your homelab (in case you have one) and then mount the remote scripts folder as a local volume on your machine, this way you can have a single scripts folder that is shared across multiple devices on your network. Just make sure to set Witchcraft to point to the correct server address instead of the default127.0.0.1.A comprehensive list of ways to start a web server can be found here.
Checking that everything is working
Section titled “Checking that everything is working”As soon as Witchcraft is able to reach the server, the status indicator will turn green:

If it doesn’t, check that the server address is correct. Witchcraft will look for the server at http://127.0.0.1:5743. If you choose a different port (or start the server in a different machine), make sure to configure it accordingly in the extension’s settings by clicking on the Witchcraft icon in the Chrome toolbar and updating the server address field.
You can now create a script in your scripts folder and open the corresponding web page to see it in action.
If you encounter any problems, feel free to ask for help here.